Integrating a maintenance mode into the development process of a web application is akin to installing a safety net beneath a high-wire act. It is a strategic approach that offers numerous benefits, ensuring a smoother and more user-centric experience throughout the application's lifecycle. Maintenance mode provides developers with the means to fine-tune, update, and troubleshoot their creation without subjecting users to unexpected disruptions or errors. This proactive approach not only reflects a commitment to quality but also enhances user trust, minimizes downtime, and ultimately results in a more robust and reliable web application. In this post, we are aiming to jump into the compelling reasons why having a maintenance mode is not just good, but paramount, for the development of a successful web application.
For this demo, we will be using Python (Django). Before we start, we assume that you have Python 3 installed on your environment. In a directory of your choice, run the following:
django-admin startproject maintenance_mode_app
Now, try to go to that directory and set up a python environment, in which we will install a few python libraries including django. Instructions about how to create an environment can be found here. In this demo, my environment is called “venv”. Next, let’s run the following commands to create the maintenance app in the project. This will create a directory that will contain the “views” and Urls along with any other python files we will need to create in there to get the maintenance mode set up in the project.
                                source venv/bin/activate
                                pip3 install django
                                python3 manage.py startapp base_app
                                python3 manage.py startapp maintenance
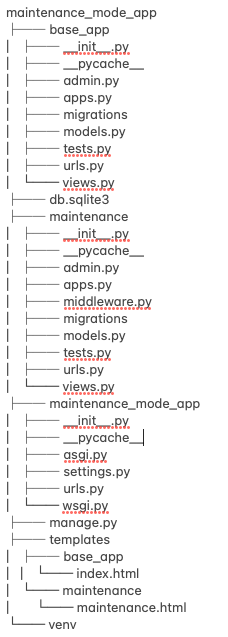
At this point, if you run a tree command on the maintenance_mode_app, you should see the following tree:

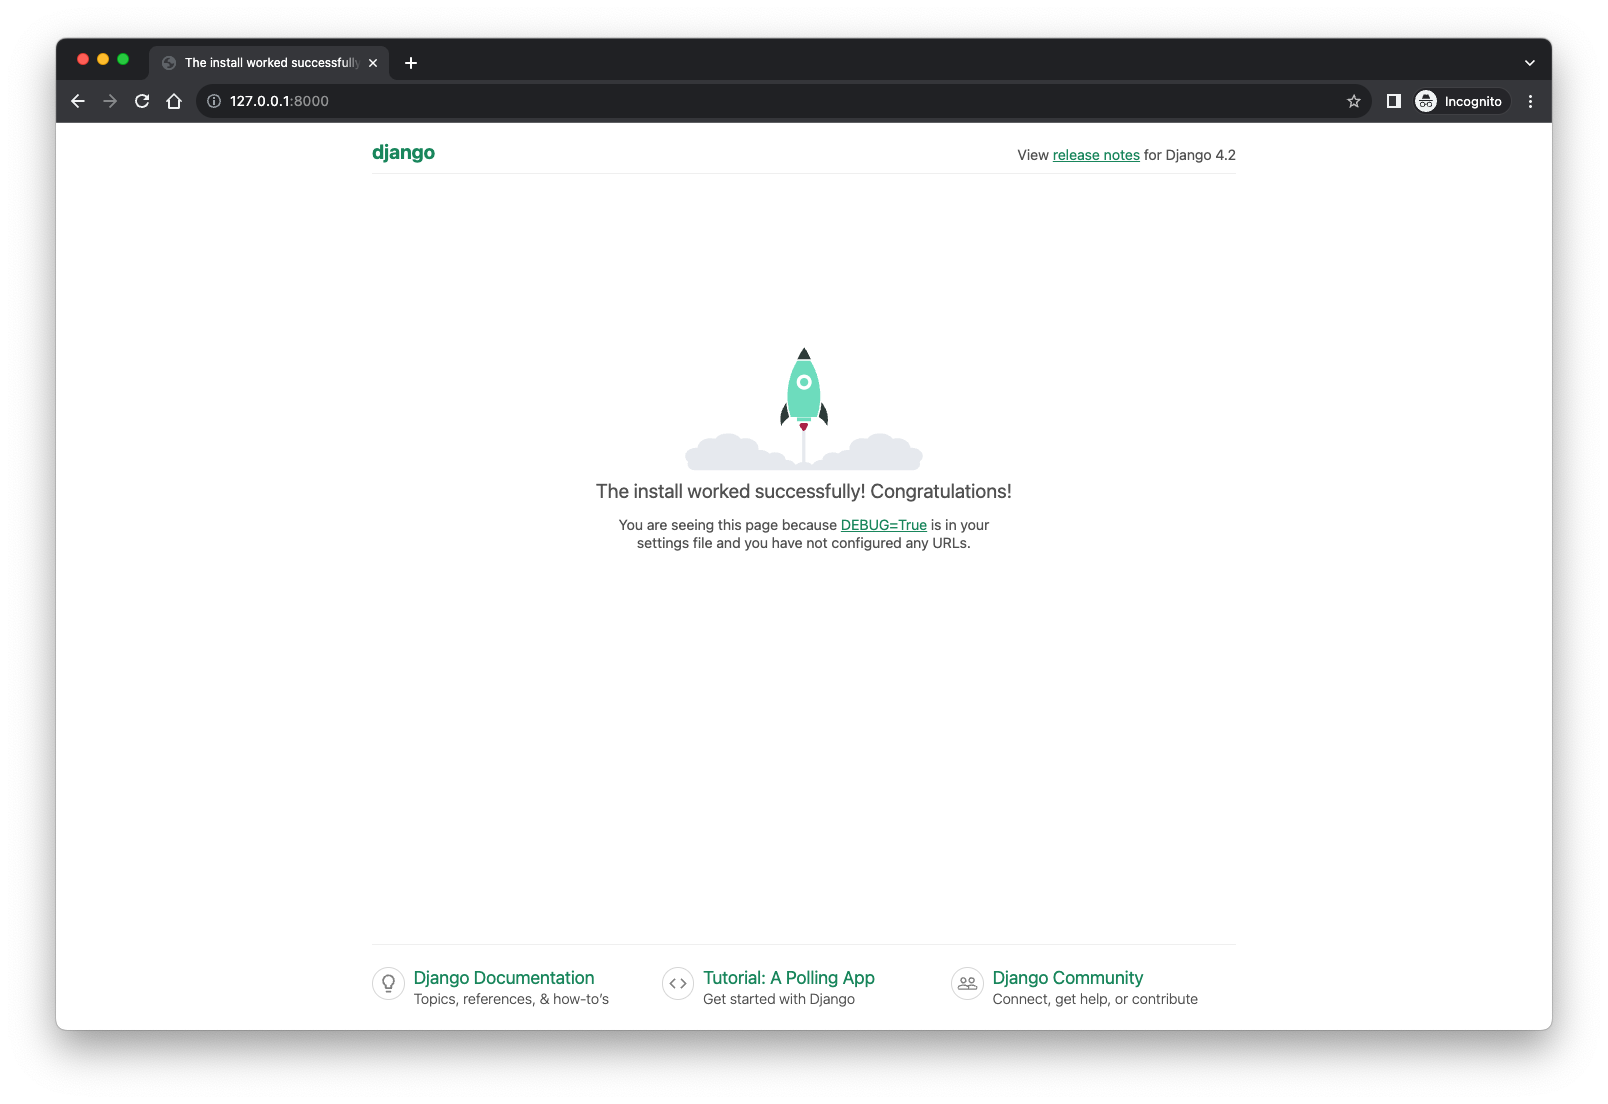
If we run the following command inside the maintenance_mode_app directory, we should see the project being served on a localhost Url. Mine is served at http://localhost:8000, as seen below:
python3 manage.py runserver

You can follow the same method we use to create the base_app and maintenance apps to create as many apps as needed, per your business needs.
We have now created the maintenance mode app inside of our application and we are ready to create a middleware for it. Let’s create a middleware.py file inside the maintenance directory, and add the following content to it:
                                from django.shortcuts import reverse, redirect
                                from django.conf import settings


                                class MaintenanceModeMiddleware:
                                    def __init__(self, get_response):
                                        self.get_response = get_response

                                    def __call__(self, request):
                                        path = request.META.get('PATH_INFO', "")
                                        query = request.META.get('QUERY_STRING', "")

                                        if settings.MAINTENANCE_BYPASS_QUERY in query:
                                            request.session['bypass_maintenance'] = True

                                        if not request.session.get('bypass_maintenance', False):
                                            if settings.MAINTENANCE_MODE and path!= reverse("maintenance:maintenance"):
                                                response = redirect(reverse("maintenance:maintenance"))
                                                return response

                                            if not settings.MAINTENANCE_MODE and path == reverse("maintenance:maintenance"):
                                                response = redirect(reverse("base_app:index"))
                                                return response

                                        response = self.get_response(request)

                                        return response
What this file tells the server is to create a middleware in which we will route any new request to the maintenance page if maintenance mode is turned on and the bypass_password is not set as a parameter in the browser. So, now let’s go to the maintenance_mode_app/settings.py file and register the middleware service. Add the following to the MIDDLEWARE section:
'maintenance.middleware.MaintenanceModeMiddleware'
Also, in INSTALLED_APPS, let’s add the following to register the base_app and maintenance apps:
                                'base_app',
                                'maintenance'
Then, the following at the bottom of the settings.py file. This is where we tell the middleware whether maintenance mode is set or not by changing 0 to 1 and vice-versa:
                                MAINTENANCE_MODE = int(os.environ.get("MAINTENANCE_MODE", 0))
                                MAINTENANCE_BYPASS_QUERY = os.environ.get("MAINTENANCE_BYPASS_QUERY")
Lastly, we will need to add one more thing to that file but before we do that, in the project root directory, let’s create a directory called “templates”. This is where we will store the HTML files we will need to serve the necessary pages for this demo. Once created, we go back to the settings.py file and make the following change to the DIRS in the TEMPLATES section:
'DIRS': [os.path.join(BASE_DIR, 'templates')],
Now, we are all set from a project settings perspective. Let’s create the “views” and the Urls for the pages needed. In the base_app/views.py file, let’s add the following:
                                from django.shortcuts import render

                                def index(request):
                                    return render(request, 'base_app/index.html')
In the maintenance/views.py file:
                                from django.shortcuts import render
                                from django.http import HttpResponse

                                def index(request):
                                    return HttpResponse('This is the homepage')

                                def maintenance(request):
                                    return render(request, 'maintenance/maintenance.html')
In the base_app/urls.py file:
                                from django.urls import path
                                from . import views

                                app_name = 'base_app'

                                urlpatterns = [
                                    path('', views.index, name='index'),
                                ]
In the maintenance/urls.py file:
                                from django.urls import path
                                from . import views

                                app_name = 'maintenance'

                                urlpatterns = [
                                    path('maintenance', views.maintenance, name='maintenance'),
                                ]
Then, we register these Urls in the app by adding the following to the maintenance_mode_app/urls.py file before the closing ]:
                                path('', include('base_app.urls')),
                                path('maintenance/', include('maintenance.urls')),
Lastly, we create 2 HMTL files templates/base_app/index.html and templates/maintenance/maintenance.html as follows:
                                <!DOCTYPE html>
                                <html lang="en">
                                    <head>
                                      <meta charset="UTF-8">
                                      <title>Homepage</title>
                                    </head>
                                    <body>
                                      <h1>Welcome</h1>
                                      <p>This is the home page and where the app should be rendered when served.</p>
                                    </body>
                                </html>
                                <!DOCTYPE html>
                                <html lang="en">
                                    <head>
                                        <meta charset="UTF-8">
                                        <title>Maintenance mode</title>
                                    </head>
                                    <body>
                                        <h1>Maintenance mode</h1>
                                        <p>We are currently performing maintenance on this site and it will be available shortly. We apologize for any inconvenience. For urgent needs, please reach out to email@example.com</p>
                                    </body>
                                </html>
Now, if we change the MAINTENANCE_MODE from 0 to 1 in the settings.py file, then, run the following before re-starting the server:
export MAINTENANCE_BYPASS_QUERY=bypass_password=maintenance
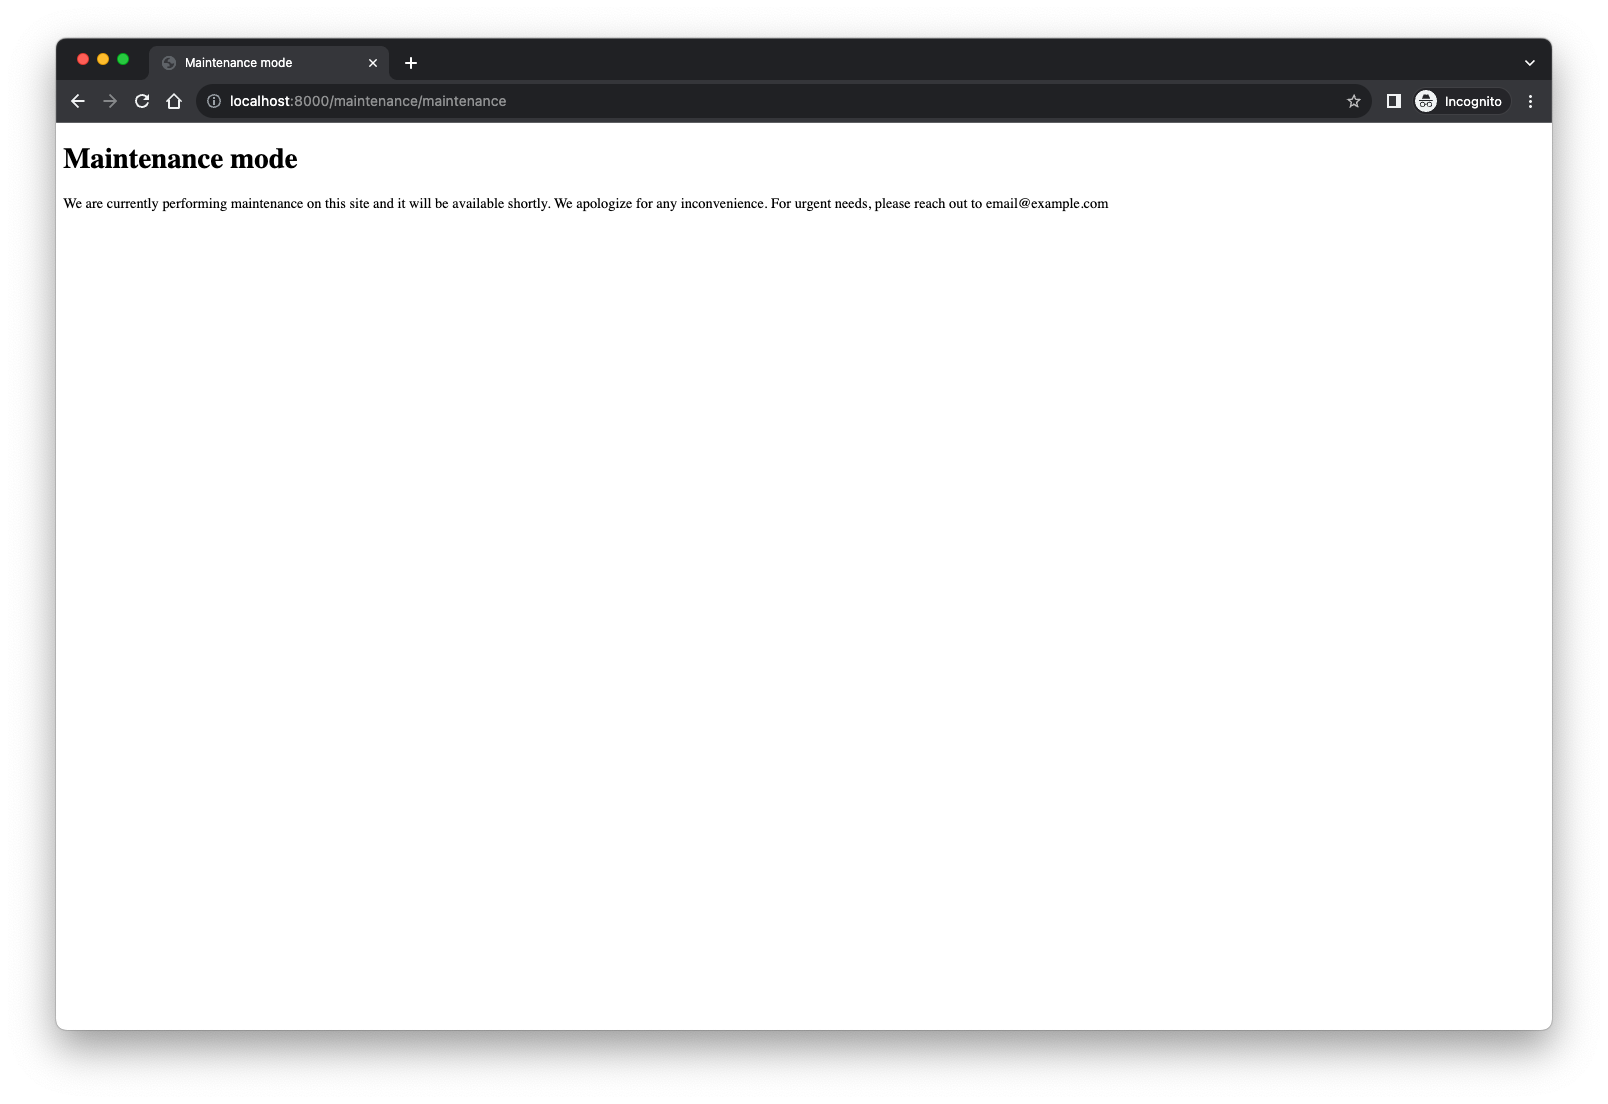
After restarting the server, if we go back to http://127.0.0.1:8000/ or wherever your servers starts at, you should see the following:

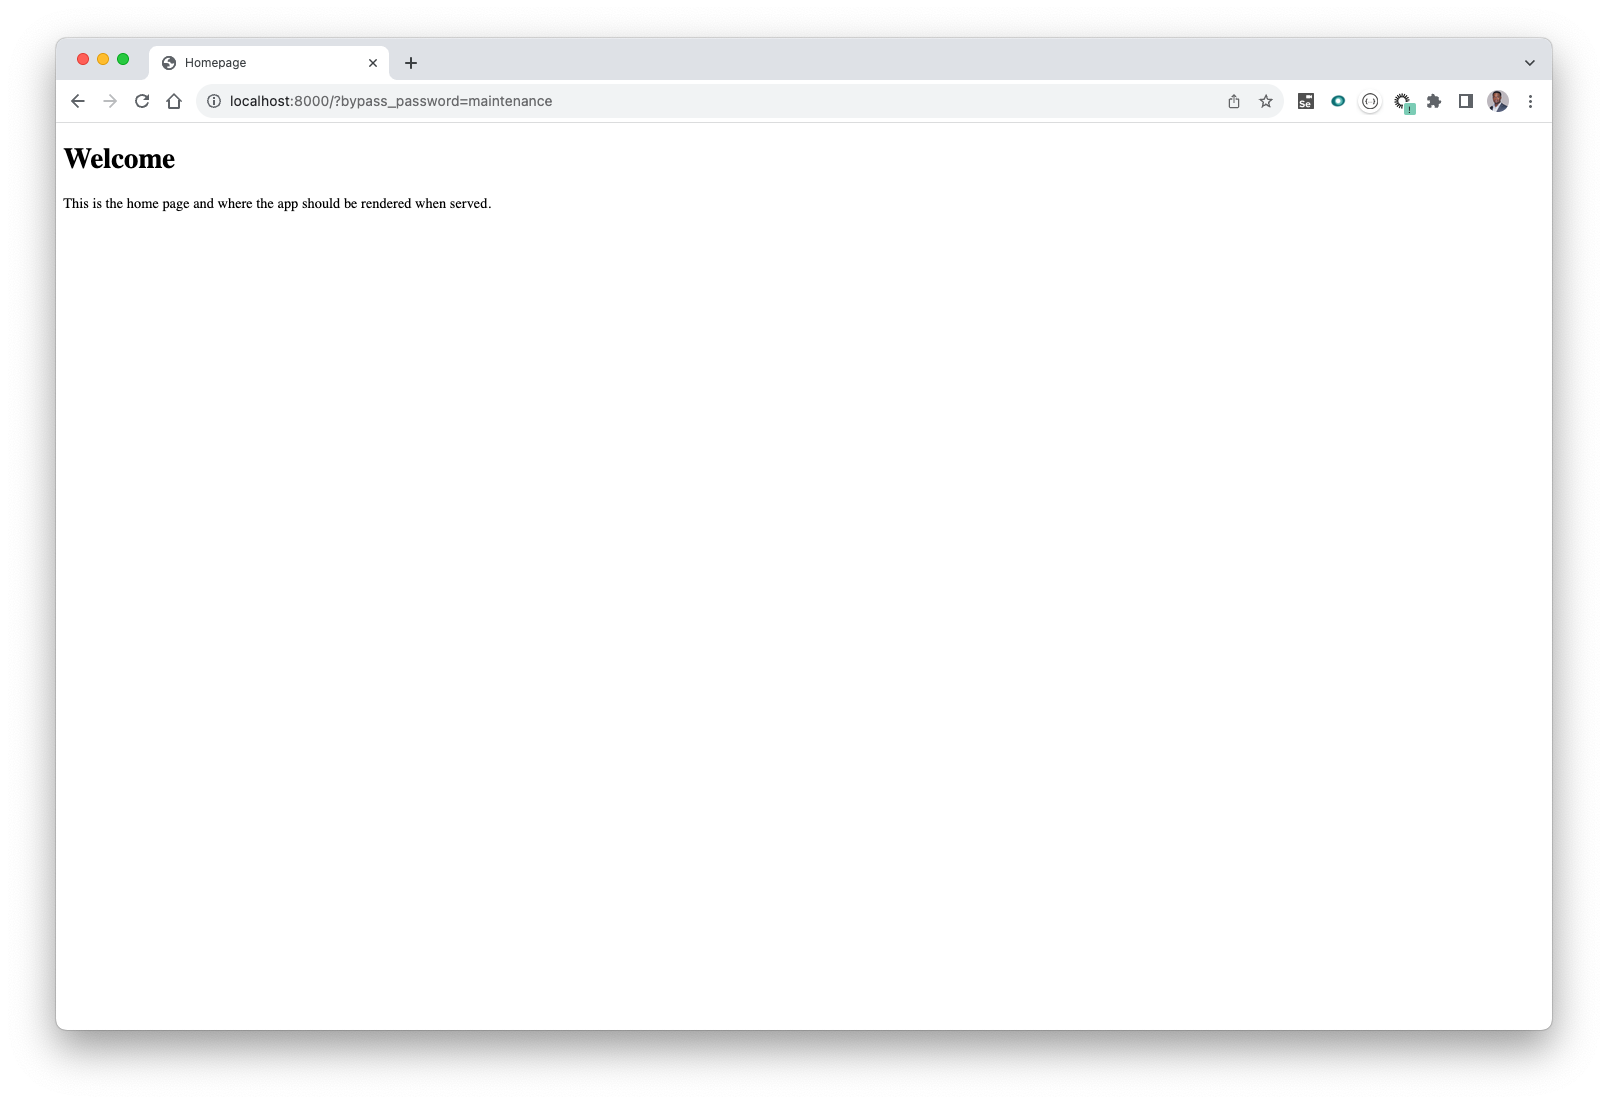
This shows that any user trying to get to the application would be directed to the maintenance page. In contrast, if we go back to the browser and instead enter http://127.0.0.1:8000/?bypass_password=maintenance, we should see the index (homepage) page being served normally, as seen below:

Ultimately, if the user is part of your DevOps or developer team, they would know the maintenance password, which of course should not be just the word “maintenance”, but the idea is that only users with the right bypass_password parameter can access the application during the maintenance period. Once maintenance is complete, all you would need to do is go back to the settings.py file and change the setting back to 0.
In conclusion, adding a maintenance mode to a website is important because it allows you to temporarily take your site offline or restrict access to users while performing updates, upgrades, or fixes. This helps ensure a smooth user experience and prevents potential errors or disruptions during the maintenance process. It also communicates transparency and professionalism to visitors, informing them that the site is undergoing improvements rather than being broken.